The feature works, and now someone has to prove it. So you record your screen, fumble the narration, re-record, trim it, upload it somewhere, and paste a link — twenty minutes of work that has nothing to do with building. Most teams skip it, and "done" ends up meaning a green check in CI that nobody outside engineering can see.
How it works
Finish the feature
Build as usual in Claude Code. When the work is done, run /vidmatic_demo:record — it reads your recent commits and diffs to decide what is worth showing.
Claude Code records it
Playwright drives your running app through the real journey — no mock screens — while an AI voice-over is timed to the scenes actually captured, not to a script written in advance.
Share the link
You get a public URL of a narrated demo. Paste it into Slack, a PR description, or a release note — your product team watches the feature instead of reading about it.
- Validate the scope you just shipped — watch the journey end to end instead of trusting a checklist
- Narration is timed to the recording that actually happened, so the voice never describes the wrong screen
- A shareable URL for people who will never open your repo
Set it up in about five minutes
The skill runs inside Claude Code and talks to Vidmatic through an MCP server. You install it from GitHub, create one API key, and run a single command that proves the whole pipeline works before you point it at real work.
Private beta. Step 3 — creating your API key — works today. The GitHub repository and the vidmatic-mcp package in steps 1, 2 and 5 are not public yet, so those commands will not resolve. The steps below are the real ones; email us and we will get you access while they roll out.
1. Install the skill from GitHub
The skill is a folder of instructions Claude Code reads. Clone it and copy it into the project you want demoed.
git clone https://github.com/Vidmatic-AI/vidmatic-claude-skill.git mkdir -p .claude/commands cp -r vidmatic-claude-skill/vidmatic_demo .claude/commands/Prefer it in every project? Copy into ~/.claude/commands/ instead — but pick one. If both exist the user-level copy silently wins, which is how you end up running a stale version without noticing.
2. Install the MCP server
This is what lets Claude Code upload the recording and request the voice-over. It is a small Python package with no vidmatic checkout required.
pip install vidmatic-mcp3. Create an API key
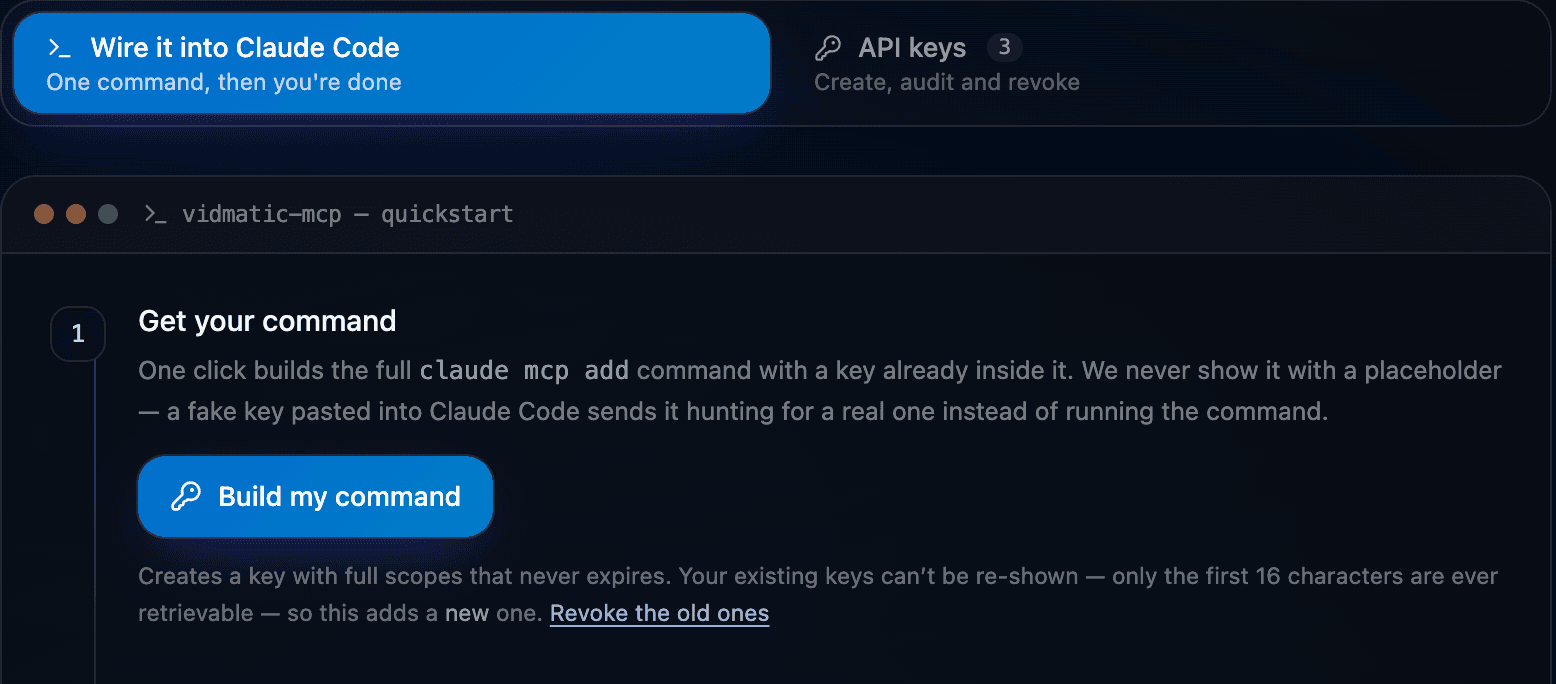
Open Settings → Developer in Vidmatic and choose New key. The dialog is already set up for this — the four scopes the skill needs are pre-selected. The secret is shown once, so copy it before closing.

Only the first 16 characters are ever retrievable afterwards; the rest is stored as a hash. Lose it and you mint a new one.
4. Register the key with Claude Code
The key travels as an environment variable on the MCP server process — never in a file you commit.
claude mcp add vidmatic \ --env VIDMATIC_API_KEY=vk_sk_your_key_here \ -- vidmatic-mcp5. Prove it works
Start your app's dev server, then run this in Claude Code. It checks your machine, records about eight seconds of your own landing page, narrates one line, and publishes it — the smallest possible run that exercises every step of the pipeline.
/vidmatic_demo:initYou should get back a public URL playing a short clip of your landing page saying "Hello DEMO via vidmatic!". If anything is missing — ffmpeg, a browser binary — this is where it tells you, before you have invested ten minutes in a real demo.
6. Demo something real
Build a feature, then run the full command. Claude Code works out what changed, storyboards the journey, records it against your running app, and hands back the link.
/vidmatic_demo:record
Requires Claude Code, Node, and ffmpeg on your machine. The first run downloads a headless browser; everything else is already in place.
Ship It, Then Show It
Your next feature can demo itself — recorded, narrated, and shared before you close the PR.
Explore more Vidmatic use cases